Halloween Monster Donuts
These Halloween Monster Donuts are a delightful treat that will add a touch of fun to your Halloween celebrations. Perfect for parties, school lunches, or an afternoon snack, these donuts are easy to make and require no baking! With only a few ingredients, you can create spooky monsters that will bring smiles and joy to kids and adults alike.
Why You’ll Love This Recipe
- Quick and Easy: Assemble these donuts in just 5 minutes with no baking required!
- Fun for Everyone: Perfect for kids’ parties or family gatherings—everyone loves a spooky treat!
- Creative Expression: Customize each donut with different colors of M&M’s for unique monster characters.
- Minimal Cleanup: Using pre-made donuts means less mess in the kitchen and more time for fun.
- Kid-Friendly Activity: Get the little ones involved in assembling their own monster creations.
Tools and Preparation
Gather your tools before starting to make the process smooth and enjoyable.
Essential Tools and Equipment
- Plastic vampire teeth
- Honey glazed donuts
- White icing or melted chocolate
- M&M’s (various colors)
- Paper towels
Importance of Each Tool
- Plastic vampire teeth: These add the monster element to your donuts, making them visually appealing.
- Honey glazed donuts: The base of your creation; sweet and delicious, they set the stage for fun.
- White icing: Acts as an adhesive to keep eyes in place while adding sweetness.
- M&M’s: Provide vibrant colors and a crunchy texture that enhances each donut’s personality.
Ingredients
For the Donuts
- Honey glazed donuts (1 per monster)
For the Monster Features
- Plastic vampire teeth (glow-in-the-dark or regular)
- M&M’s (2 per donut for eyes)
For Adhesion
- White icing, melted chocolate, or any edible glue (to attach eyes)
How to Make Halloween Monster Donuts
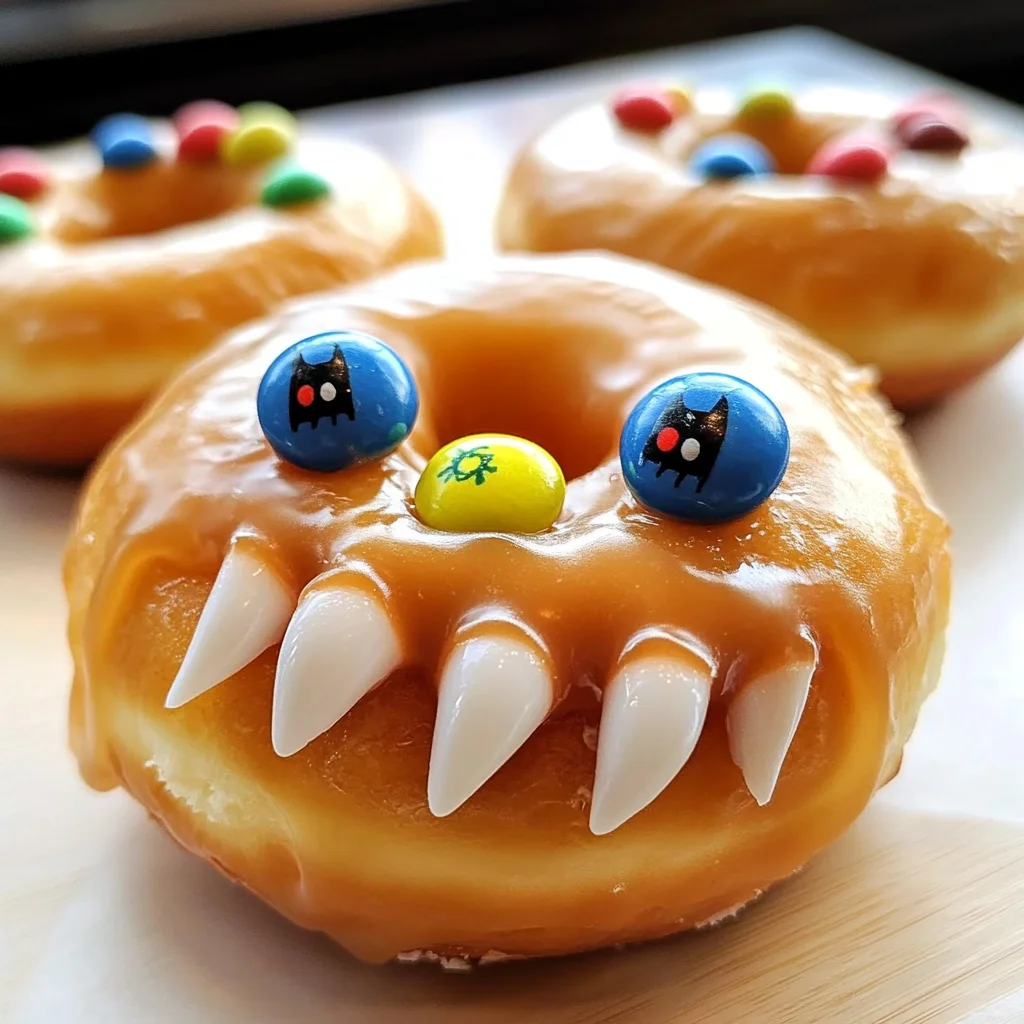
Step 1: Prepare the Vampire Teeth
Unwrap and clean the plastic vampire teeth thoroughly using soap and water. Dry them completely with a paper towel.
Step 2: Assemble Your Monster Donut
Take a honey glazed donut and gently squeeze the vampire teeth together. Push them into the center hole of the donut and let them open on their own. Adjust as needed to sit snugly in place.
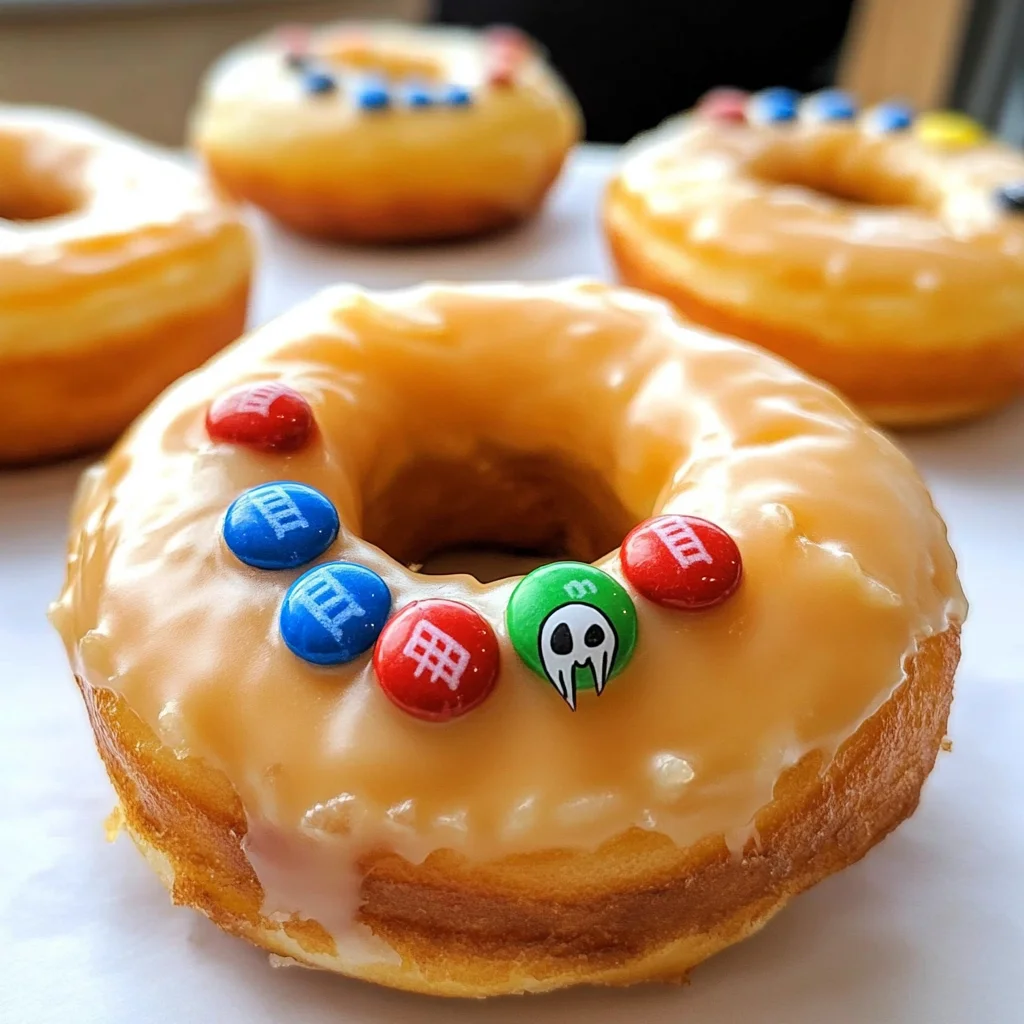
Step 3: Add Monster Eyes
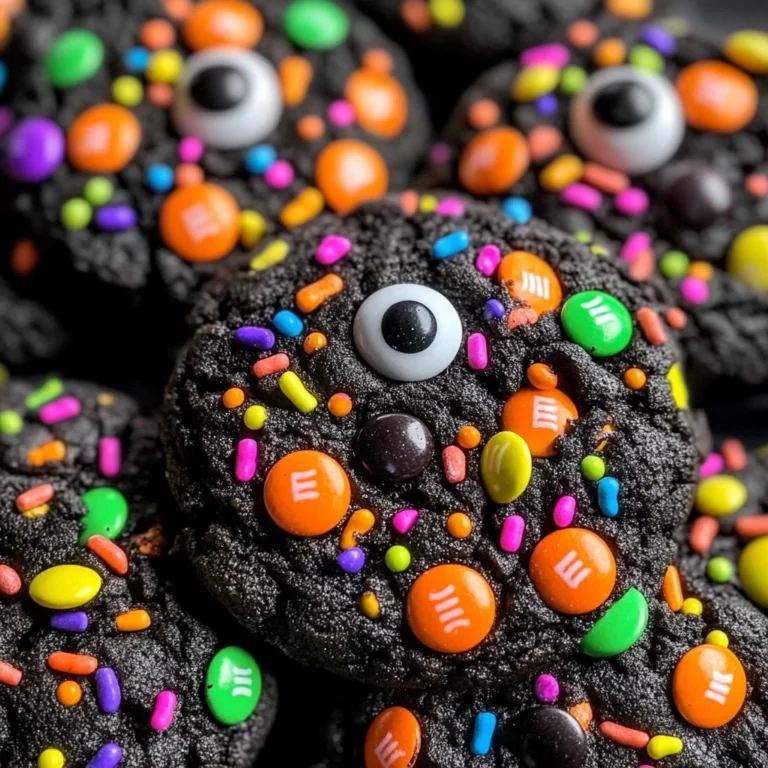
Apply a small dot of white icing (or your chosen edible adhesive) where you want each eye to go. Press an M&M onto each icing dot, with the M side facing down. You can use different colors to give each donut a unique monster personality.
Step 4: Repeat for More Monsters
Repeat the steps for each donut until you have created your spooky lineup of Halloween Monster Donuts!
Optional Surprise Presentation
Place the monster donuts back in the donut box for a fun surprise reveal when serving!
How to Serve Halloween Monster Donuts
These Halloween Monster Donuts are as fun to serve as they are to make! Whether for a spooky party or a festive family gathering, here are some creative ideas for presenting your delightful treats.
On a Spooky Platter
- Arrange the donuts on a black or orange platter to enhance their Halloween theme.
- Add fake spider webs and plastic spiders around them for added frightful flair.
In Individual Treat Bags
- Place each donut in clear treat bags tied with colorful ribbons.
- This is a great way for guests to grab and go during parties.
As Centerpieces
- Stack a few donuts in varying heights on a cake stand.
- Decorate the stand with autumn leaves or small pumpkins for an eye-catching display.
With Themed Drinks
- Serve alongside colorful fruit punch or themed drinks like witches’ brew.
- Use clear cups to showcase the vibrant colors of your beverages.
At Kids’ Parties
- Set up a DIY station where kids can decorate additional donuts with various toppings.
- This keeps them entertained and allows for creativity!
How to Perfect Halloween Monster Donuts
To ensure your Halloween Monster Donuts turn out perfectly, follow these simple tips. They will help elevate your assembly and presentation game!
- Choose fresh donuts: Fresh honey glazed donuts hold their shape better and taste delicious.
- Use quality edible glue: A good icing or melted chocolate ensures that the M&M’s stay secure on the donuts.
- Mix colors: Use different colored M&M’s for eyes; it adds personality and makes each donut unique!
- Check teeth size: Make sure the vampire teeth fit snugly in the donut hole—this creates a more realistic monster look.
- Keep it clean: Wash hands and utensils thoroughly when handling decorations to maintain hygiene.
- Serve immediately: For best results, serve the donuts shortly after assembling to keep them looking fresh.
Best Side Dishes for Halloween Monster Donuts
Pairing side dishes with your Halloween Monster Donuts can create a fun and festive spread. Here are some great options!
-
Pumpkin Soup
A warm bowl of pumpkin soup provides a cozy contrast to sweet donuts and fits the fall theme perfectly. -
Vegetable Platter
Offer a variety of colorful veggies like carrots, celery, and bell peppers served with hummus for dipping—healthy and festive! -
Cheese Cubes
A mix of cheese cubes adds savory flavor that complements the sweetness of the monster donuts, making for balanced snacking. -
Fruit Skewers
Assemble skewers with seasonal fruits like grapes, apples, and oranges. They offer freshness alongside your sweet treats. -
Popcorn Mix
Create a spooky popcorn mix by adding candy corn, nuts, or pretzels; it’s crunchy and fun to munch on! -
Spooky Cupcakes
Decorate cupcakes with ghostly frosting or creepy designs; they can be an exciting addition to your dessert table. -
Gummy Worms
Scatter gummy worms around your serving area for an eerie touch that kids will love! -
Chocolate-Dipped Pretzels
These salty-sweet snacks are easy to make and serve as excellent finger food at any Halloween gathering!
Common Mistakes to Avoid
Making Halloween Monster Donuts can be fun, but there are some common mistakes to steer clear of to ensure your spooky treats are a hit.
-
Ignoring cleanliness: Always clean the plastic vampire teeth before using them. This avoids any potential contamination and ensures a safe treat.
-
Not securing the eyes correctly: Use enough icing or edible glue to secure the M&Ms as eyes. If they are not properly attached, they may fall off during handling.
-
Choosing the wrong donuts: Opt for honey glazed donuts that have a sturdy structure. Donuts that are too soft might not hold up well with the added decorations.
-
Forgetting to customize: Don’t be afraid to mix and match colors of M&Ms for unique monster designs. This adds fun and creativity to your donuts!
-
Skipping the surprise reveal: Placing the finished monster donuts back in the donut box enhances the excitement when serving them. A fun presentation can elevate your treat!
Storage & Reheating Instructions
Refrigerator Storage
- Store in an airtight container for up to 2 days.
- Keep away from direct sunlight or heat sources.
Freezing Halloween Monster Donuts
- Freeze unassembled donuts for up to 1 month.
- Wrap each donut individually in plastic wrap before placing them in a freezer bag.
Reheating Halloween Monster Donuts
- Oven: Preheat oven to 350°F (175°C). Place donuts on a baking sheet for about 5 minutes until warmed through.
- Microwave: Heat each donut on a microwave-safe plate for about 10-15 seconds for a quick warm-up.
- Stovetop: In a non-stick skillet, heat over low heat for about 2-3 minutes, flipping occasionally.
Frequently Asked Questions
Here are some common questions about making Halloween Monster Donuts.
Can I make Halloween Monster Donuts ahead of time?
Yes, you can prepare them a day in advance. Just store them in an airtight container in the refrigerator until ready to serve.
What can I use instead of M&Ms?
You can use chocolate chips, candy corn, or even gummy candies for eyes if you’re looking for alternatives to M&Ms.
Are there variations of Halloween Monster Donuts?
Absolutely! You can decorate with different types of candies or use various colored icing to create unique monster designs.
How long do Halloween Monster Donuts last?
These donuts will stay fresh for about 2 days in the refrigerator. For longer storage, consider freezing them unassembled.
Final Thoughts
Halloween Monster Donuts are not just adorable; they are also incredibly easy to make and customize. With endless decorating options, you can create unique monsters that will delight everyone at your gathering. Give this fun recipe a try and enjoy creating spooky smiles!
Halloween Monster Donuts

Get ready to bring some spooky fun to your Halloween festivities with these delightful Halloween Monster Donuts! These no-bake treats are perfect for parties, school lunches, or a festive afternoon snack. With just a few simple ingredients, you can create an array of lively monster characters that will charm both kids and adults alike. Easy to assemble in just minutes, these donuts offer a fantastic opportunity for creativity and customization. Whether you’re hosting a gathering or looking for a fun activity with the little ones, these monster donuts are sure to delight!
- Prep Time: 10 minutes
- Cook Time: 0 minutes
- Total Time: 10 minutes
- Yield: 12 servings
- Category: Dessert
- Method: No-bake
- Cuisine: American
Ingredients
- Honey glazed donuts
- Plastic vampire teeth
- M&M's (various colors)
- White icing or melted chocolate
Instructions
- Clean the plastic vampire teeth thoroughly and set aside.
- Take a honey glazed donut and insert the vampire teeth into the center hole.
- Apply small dots of white icing where you want each eye and press an M&M onto each dot.
- Repeat until all donuts are decorated.
Nutrition
- Serving Size: 1 serving
- Calories: 230
- Sugar: 15g
- Sodium: 150mg
- Fat: 9g
- Saturated Fat: 3g
- Unsaturated Fat: 5g
- Trans Fat: 0g
- Carbohydrates: 35g
- Fiber: 1g
- Protein: 2g
- Cholesterol: 0mg