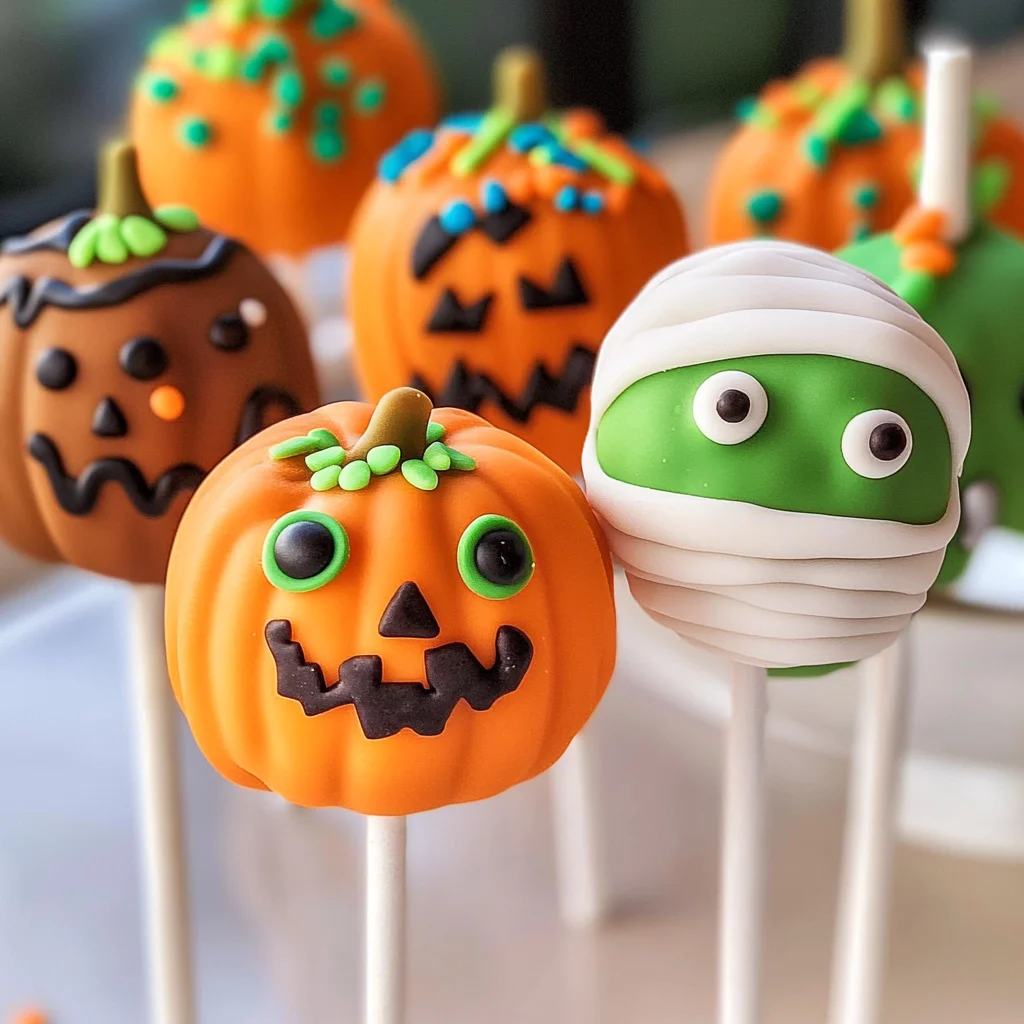
Halloween Cake Pops
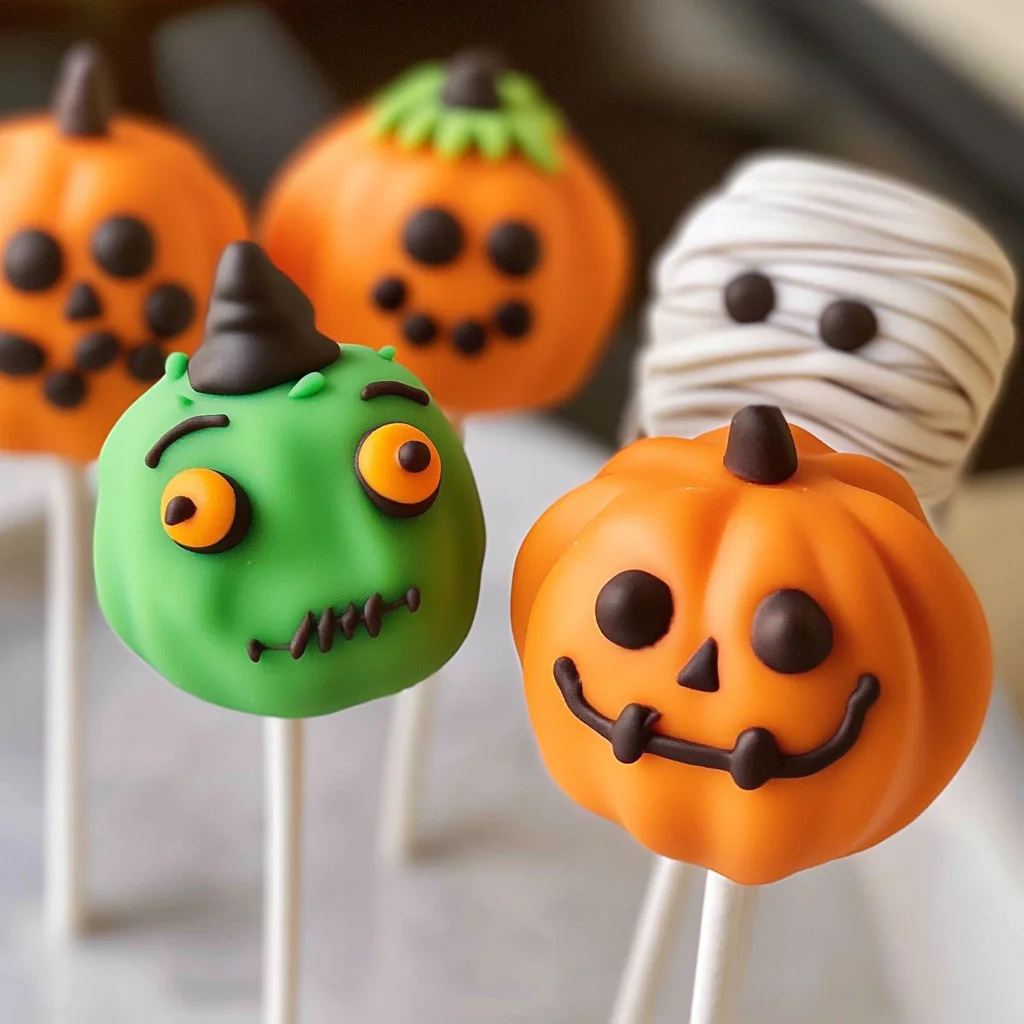
Add these spooky cake pops to your next Halloween party. Made from vanilla or chocolate cake, these bite-sized treats are perfect for any festive gathering. Halloween Cake Pops can be decorated as a Pumpkin, Frankenstein, or Mummy, making them not only delicious but visually exciting too.
Why You’ll Love This Recipe
- Easy to Make: This recipe simplifies the cake pop process so you can enjoy the fun without the fuss.
- Customizable Designs: Get creative with decorations! You can transform these cake pops into various spooky characters.
- Perfect for Parties: Halloween Cake Pops are delightful treats that will impress guests at any Halloween celebration.
- Kid-Friendly Fun: Involve kids in the decorating process for an engaging family activity that sparks creativity.
- Delicious Flavor: With a moist cake base and sweet candy coating, these cake pops are utterly irresistible.
Tools and Preparation
Gathering the right tools is essential for making your Halloween Cake Pops fun and easy. Here’s what you’ll need:
Essential Tools and Equipment
- Mixing bowl
- Electric mixer
- 13 x 9-inch baking pan
- Cookie sheet
- Parchment paper
- Microwave-safe bowl or double boiler
Importance of Each Tool
- Mixing bowl: A large mixing bowl allows you to combine all ingredients easily without mess.
- Electric mixer: This tool speeds up the mixing process, ensuring a smooth batter with minimal effort.
- Baking pan: A proper-sized pan ensures even baking, which is crucial for perfect cake texture.
Ingredients
To make your Halloween Cake Pops, gather the following ingredients:
For the Cake Base
- 1 box Favorite cake mix
- 1 3.4 oz box instant pudding mix
- 4 eggs
- 1 cup water
- 1/3 cup vegetable oil
For the Decoration
- 1 cup Frosting
- Candy Melts
- Toppings – sprinkles, candy eyes
How to Make Halloween Cake Pops
Step 1: Preheat the Oven
Preheat your oven to 350°F (175°C). Spray your 13 x 9-inch baking pan with vegetable pan spray to prevent sticking.
Step 2: Prepare the Cake Batter
In a large bowl, combine the cake mix, pudding mix, eggs, water, and oil. Beat at medium speed for about 2 minutes until well blended. Pour this mixture into the lightly greased baking pan.
Step 3: Bake the Cake
Bake in preheated oven for 30-40 minutes. Check with a toothpick; it should come out clean when inserted into the center of the cake. Once baked, cool in the pan for about 10 minutes.
Step 4: Crumble the Cake
After cooling, crumble the cake into fine pieces using your hands or two forks until no large chunks remain.
Step 5: Mix with Frosting
Add frosting to crumbled cake and mix using your fingers until fully combined. The mixture should be moist but not overly sticky.
Step 6: Form Cake Balls
Using your hands, roll the mixture into small balls (about 1 inch in diameter). Place them on a cookie sheet lined with parchment paper.
Step 7: Chill Before Dipping
Chill the formed cake balls in the refrigerator for at least 2 hours to allow them to firm up.
Step 8: Melt Candy Melts
Melt Candy Melts in a microwave-safe bowl by heating in 30-second intervals at medium power until smooth. Alternatively, use a double boiler on low heat.
Step 9: Insert Sticks
Dip one end of lollipop sticks into melted Candy Melts and insert them into each chilled cake ball. Allow them to set upright; placing them in the freezer can speed this up (about 20 minutes).
Step 10: Dip and Decorate
Once firm, dip each cake pop completely into melted Candy Melts. Allow excess chocolate to drip off before adding sprinkles or candy eyes while still wet.
Enjoy creating delightful Halloween Cake Pops that will be a hit at your next event!
How to Serve Halloween Cake Pops
These Halloween Cake Pops are perfect for any spooky gathering. Their fun shapes and vibrant decorations make them an eye-catching dessert that your guests will love.
As a Fun Party Favor
- Create mini gift bags of cake pops for guests to take home. This adds a personal touch to your party.
On a Spooky Dessert Table
- Arrange cake pops among other Halloween-themed treats. Use decorative platters to enhance the display, making it a focal point of your party.
At Children’s Halloween Parties
- Incorporate themed decorations such as spider webs and ghosts. Kids will enjoy picking their favorite spooky designs.
As a Halloween Craft Activity
- Set up a station for guests to decorate their own cake pops. Provide edible markers, sprinkles, and various toppings for creativity.
How to Perfect Halloween Cake Pops
Crafting the perfect Halloween Cake Pops involves attention to detail and technique. Follow these tips for delightful results.
- Use Quality Ingredients: Start with high-quality cake mix and frosting for better flavor and texture.
- Crumble Evenly: Make sure the cake is crumbled into small, uniform pieces to ensure proper mixing with frosting.
- Chill Thoroughly: Allow the formed cake balls to chill in the fridge for at least two hours; this helps them maintain their shape during dipping.
- Dip Carefully: When melting Candy Melts, ensure they are smooth. Dip the cake pops slowly to avoid drips or bubbles.
- Decorate Immediately: Apply toppings right after dipping while the coating is still wet for better adherence.
Best Side Dishes for Halloween Cake Pops
Pair these delightful Halloween Cake Pops with some fun side dishes that complement their festive nature.
- Witch’s Brew Soup: A green soup made from spinach and peas, served in cauldrons for a spooky effect.
- Mummy Dogs: Hot dogs wrapped in crescent roll dough, baked until golden brown, resembling mummies.
- Ghostly Fruit Cups: Fruit salad topped with whipped cream ghosts for a refreshing treat.
- Pumpkin Patch Salad: A colorful salad featuring pumpkin-shaped cheese balls and leafy greens.
- Spooky Veggie Platter: Carrots and cucumbers arranged like monsters or ghosts alongside a tasty dip.
- Monster Meatballs: Beef or turkey meatballs served on skewers, decorated with eyes and fangs using cheese and olives.
Common Mistakes to Avoid
Avoiding common pitfalls can make your Halloween Cake Pops a hit at any party. Here are some mistakes to watch out for:
- Bold preparation: Not properly preparing your baking pan can lead to a sticky disaster. Always grease your pan well to ensure easy removal of the cake.
- Bold mixing too much: Overmixing the cake batter can result in dense pops. Mix until just combined for a light texture.
- Bold skipping chilling time: If you skip chilling the cake balls, they may fall apart when dipped in candy melts. Always chill them for at least 2 hours to firm up.
- Bold not using enough candy melts: Insufficient candy melts can lead to uneven coating. Ensure you have enough to fully cover each cake pop.
- Bold neglecting decorations: Skipping decorations can make your cake pops less festive. Get creative with toppings like sprinkles or candy eyes for that spooky touch.
Storage & Reheating Instructions
Refrigerator Storage
- Store in an airtight container to maintain freshness.
- They last about 3-5 days in the refrigerator.
Freezing Halloween Cake Pops
- Wrap each cake pop individually in plastic wrap before placing them in a freezer-safe bag.
- They can be frozen for up to 2 months for later enjoyment.
Reheating Halloween Cake Pops
- Oven: Preheat to 350°F and warm for about 5 minutes, but it’s best enjoyed fresh.
- Microwave: Heat on low power for 10-15 seconds, but be cautious not to melt the coating.
- Stovetop: Use a skillet on low heat for a short time, watching closely to avoid melting.
Frequently Asked Questions
Here are some commonly asked questions that might help you with your Halloween Cake Pops:
How do I make Halloween Cake Pops?
To make Halloween Cake Pops, start with your favorite cake mix, prepare as directed, crumble once baked, add frosting, form into balls, and dip in melted candy melts.
Can I customize my Halloween Cake Pops?
Absolutely! You can use different flavors of cake and various toppings like nuts, coconut flakes, or colored sprinkles to match your theme.
How long do Halloween Cake Pops last?
When stored properly in the refrigerator, they can last about 3-5 days. For longer storage, consider freezing them.
What are some decoration ideas for Halloween Cake Pops?
You can decorate them like monsters, mummies, or pumpkins using candy eyes, sprinkles, or even edible glitter.
Final Thoughts
Halloween Cake Pops are not only fun to make but also delightful treats that bring festive spirit to any gathering. With endless customization options—from flavors to decorations—these cake pops will surely impress your guests. Give this recipe a try and unleash your creativity!
Halloween Cake Pops

Add some spooky flair to your Halloween festivities with these delightful Halloween Cake Pops! Perfectly bite-sized and customizable, these treat pops are made from a moist cake base and coated in sweet melted candy. Decorate them as playful pumpkins, charming mummies, or fun Frankenstein characters for a visually exciting dessert that will impress both kids and adults alike. Easy to make and even easier to enjoy, these cake pops are an engaging activity for the whole family. Whether you’re hosting a costume party or just want to add some festive cheer to your October celebrations, these Halloween Cake Pops are sure to be a hit!
- Prep Time: 15 minutes
- Cook Time: 40 minutes
- Total Time: 55 minutes
- Yield: Approximately 20 servings 1x
- Category: Dessert
- Method: Baking
- Cuisine: American
Ingredients
- 1 box favorite cake mix
- 1 3.4 oz box instant pudding mix
- 4 eggs
- 1 cup water
- 1/3 cup vegetable oil
- 1 cup frosting
- Candy melts (for coating)
- Toppings (sprinkles, candy eyes)
Instructions
- Preheat your oven to 350°F (175°C). Grease a 13 x 9-inch baking pan.
- In a mixing bowl, combine the cake mix, pudding mix, eggs, water, and oil. Beat at medium speed for 2 minutes until well blended. Pour into the prepared pan.
- Bake for 30-40 minutes or until a toothpick comes out clean. Cool for about 10 minutes in the pan.
- Crumble the cooled cake into fine pieces and mix with frosting until combined.
- Roll mixture into small balls (about 1 inch) and place on a lined cookie sheet.
- Chill in the refrigerator for at least 2 hours.
- Melt candy melts according to package instructions.
- Dip lollipop sticks into melted candy before inserting into each chilled ball. Let set upright.
- Dip each pop into melted candy melts and decorate with toppings while still wet.
Nutrition
- Serving Size: 1 serving
- Calories: 150
- Sugar: 15g
- Sodium: 80mg
- Fat: 6g
- Saturated Fat: 2g
- Unsaturated Fat: 3g
- Trans Fat: 0g
- Carbohydrates: 23g
- Fiber: <1g
- Protein: 2g
- Cholesterol: 30mg